This article was created using software version 1.2.1.5
This article will give you information about the calibration of the scanner. It explains when to calibrate and how to perform the calibration.
When to Calibrate
The scanner need to be calibrated when:
using it for the first time
changing the PC
the scanner has problem to see the markers
you transport the scanner to another location
the temperature changed (for example the scanner was in the car overnight and in the morning you take it to the office and want to start scanning)
Calibration workflow
Watch a video tutorial!
The calibration consists of 5 steps. Before you start put the calibration board on a flat surface (table, floor). Ensure the calibration board is not damaged (no scratches, no missing markers, no dirt etc). When it's good, it should look like the pic bellow.

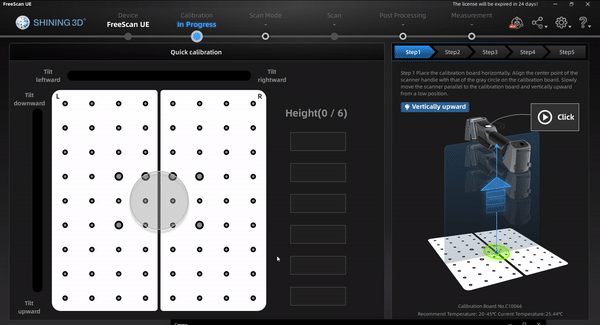
For the first calibration step hold the scanner parallel over the board, in the middle and go slowly up.
To start the calibration, you need to push the trigger one time. After the calibration is done the scanner will stop automatically.

When starting the calibration, you should see that the LEDs around the cameras are shining, and the lasers are shining as well. By moving the scanning left, right, front and back you will find the correct position that the bars on the left, on the right and the big circle in the middle are green. Like in the picture bellow.

Start the calibration from near to far until all bars on the right side are marked green.
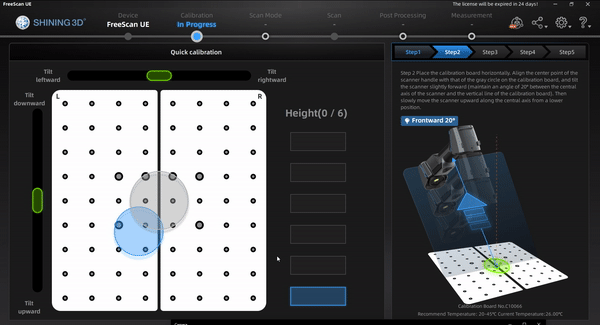
After the first step is done the second calibration step need to be done. In these steps and for the rest the lasers are OFF and only the LEDs from the scanner are ON. For the second step, the scanner must be tilted forward like in the picture bellow.
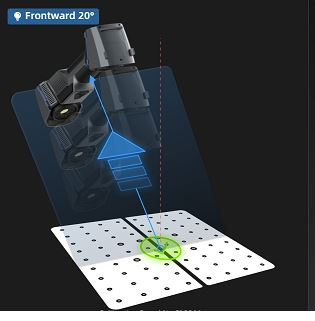
When you have tilted the scanner forward and find the correct position, please start from near to far until all bars on the right side are marked green.
Now step 3 needs to be done. For this step the scanner must be tilted backward like in the picture bellow.

When you have tilted the scanner backward start from near to far until all bars on the right side are marked green.

Now step 4 needs to be done. For this step the scanner must be tilted to the right like in the picture bellow.
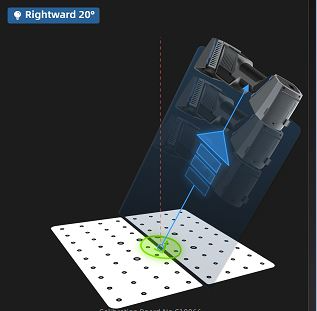
When you have tilted the scanner to the right, start from near to far until all bars on the right side are marked green.

For the last step 5 the scanner must be tilted to the left like in the picture bellow.
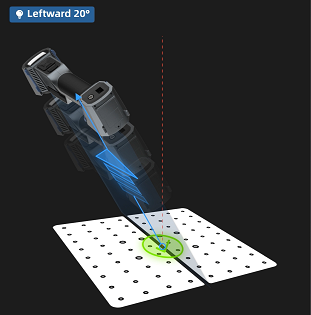
When you have tilted the scanner to the left, start from near to far until all bars on the right side are marked green.

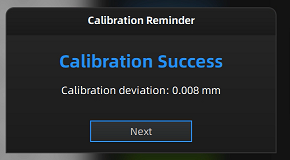
After all these steps has been done the calibration is finishes and the software start to calculate the result. If everything was done correctly a new window should pop like bellow.
If the calibration fails, please try again. If it fails a second time please check with the following article, if your PC is set up correctly:
When your PC is correctly set up but the calibration still fails, please contact us via metrology_support@shining3d.com.